
Homemade 7 Grain Bread

Homemade 7 Grain Bread
Print Recipe
INGREDIENTS
- 1 cup Bob’s Red Mill 7 grain hot cereal
- 3 cups of water
- 2/3 cups of honey
- 1/2 cup of butter cut into chunks and melted
- 1 1/2 tablespoons of salt
- 2 tablespoons of yeast
- 4 cups whole-wheat flour (I use King Arthur)
- 1 cup spelt flour (also Bob’s Red Mill)
- 2-3 cups bread flour
DIRECTIONS
- Heat a little more than 3 cups of water until it reaches about 115°. I heated mine up in a teapot—make sure you take it off early, because if it whistles, then it’ll be way too hot. If you take it off too soon, you can always microwave it to get it to the right temperature
- Put the hot cereal into a large bowl
- Pour 3 cups of the water into a large measuring cup, or a medium bowl, and add the honey and melted butter
- Once everything is combined, pour the water mixture into the large bowl, and let the cereal soak for about 10 minutes (It won’t look like oatmeal, but it won’t be as crunchy as completely dry)
- In the bowl of a stand mixer, combine the salt, yeast, and whole-wheat flour. Using the paddle attachment, mix the dry ingredients until well incorporated
- Also, during this 10 minutes, I prepare all my bowls and the oven. For a good place to rise, I fill a square brownie pan with about an inch of water and put it in the bottom rack of the oven. Then, I preheat my oven to 170°, and turn it off as soon as the beeper tells me the oven is ready. This way, there is a warm (not too warm!), moist area for the bread to get a good rise.
- Then, I liberally butter a very large mixing bowl, and set it aside
- After that, use a thermometer to make sure the hot cereal mix is no hotter than 115°. I usually have mine right about 110°
- Turn the mixer on to the lowest speed, and slowly add in the hot cereal mixture
- Mix for about a minute and then add the spelt flour
- Once that is well mixed, scrape down the sides of the bowl, and switch to the dough hook
- Add 1 more cup of whole wheat flour and knead well. My kitchen aid is not very powerful, so I usually can use the dough hook to knead in this last cup of whole wheat flour before it starts to strain. Once that happens, I put about ½ a cup of bread flour on a clean surface and dump the dough out onto the breaded surface.
 |
| This is what it will look like right before I dump it onto the floured surface--really sticky |
- Once the dough is on the floured surface, I sprinkle the top with about ½ cup more of bread flour and spread it around
- Start kneading! I usually just fold the dough in half and squish it down, over and over, adding flour as necessary. I usually end up using about 2 1/2 cups of bread flour
- Knead the bread for a few minutes, you’ll know it’s ready when it’s not dry, but not sticky, and feels kind of elasticy. Also, if you poke a hole in it with your finger, the dough should regain its shape quickly.
- Put the dough into the large buttered bowl that was set aside earlier, and move it around so it has butter on the entire surface

- Cover with a clean cloth and put in the toasty oven
- Let rise for 45 minutes. During this time I clean up the ridiculous amount of flour all over my kitchen, and prepare my bread pans with a healthy slathering of butter.
- Once the bread has risen, plop the dough onto a clean surface big enough to roll the dough out
 |
| Notice that it has just about doubled in size and you can see where I poked a hole with my finger, and the dough did not regain shape |
- This is where I reheat my oven to 170° and then turn it off, like before, to make sure the oven is warm enough for the second rise
- Split the dough into two blobs. I have one really large bread pan, where I put 2/3 of the dough, and one smaller one for the remaining 1/3
- Roll one glob of dough out into a big oval. You’ll want the shorter side of the dough to be about as long as the pan you’re using. The main goal here is to get out air bubbles, which you should see coming to the edges of the dough when using the rolling pin
- Once the dough is in a nice oval—not too thin, then roll it up nice and snug. Pinch down the seams and shape your log so it fits nicely into one of the bread pans.

- Roll the loaf in oats to make it pretty, and push the edges together until it fits snugly into the bread pan
- Do the same with the second ball of dough

- Place the two pans of dough into the warm oven, and cover with the clean cloth again. Make sure there is still water in the pan at the bottom of the oven
- Let rise again for 45 more minutes.

- Pull the loaves out of the oven and set aside. Dump the water from the pan at the bottom, and then place the empty pan back in oven where it was before (This hot pan is going to help us get our delicious crust)
- Preheat the oven to 350°
- Once the oven is ready, place the pans in there side by side on the middle rack
- Bake for 25 minutes
- Turn up the temperature to about 400° and rotate pans to different sides of the oven. Bake for 4 minutes.
- Rotate the bread once more, not moving to different sides of the oven, but turning each pan 180°. Bake for 4 more minutes.
- Tap on the bread, and it should sound hollow. The tops should be golden brown. You can also use a thermometer and the middle should be about 190°
- When the crust is of a desired color, pull the pans out and let them sit on a cooling rack for 5 minutes or so before removing from the pans

- Gently roll the loaves out onto the cooling rack, and flip back upright quickly

- This is usually where I smell and admire my bread, call over whomever is in my apartment and make them tell me how delicious it looks.
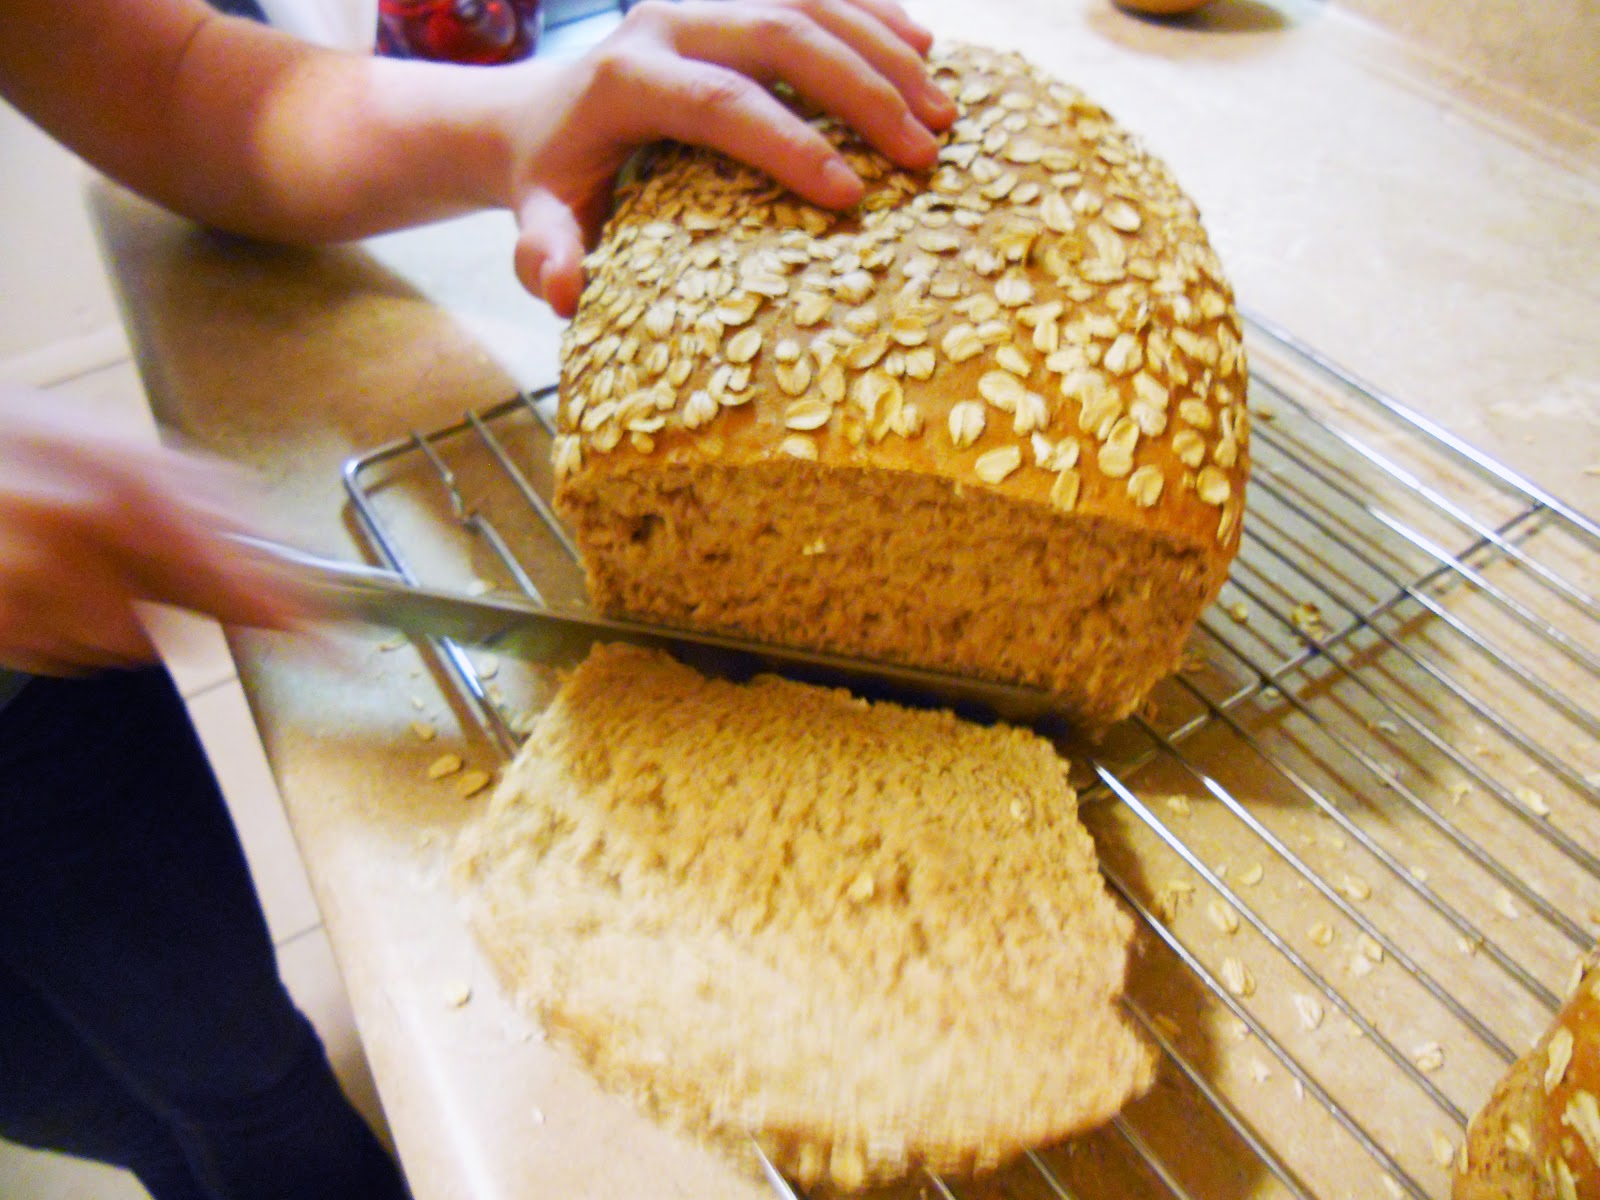
- Slice and enjoy!
- Make sure the bread is completely cooled before you wrap it up, or else it will make the crust soggy
- I usually put my loaf back in the bread pan and cover with saran wrap and foil. The bread freezes well so you have a loaf for later.
Nutrition Information:
This is for 1 slice, if each loaf is cut into 12 slices

Pin It Now!
Looks so awesome! I want!
ReplyDeleteGreatt reading this
ReplyDelete